
How to Take Better Food Photos for Your Food Diary
John the smoothie monster
John lives for smoothie bowls and cold-pressed juices. He uses Savor to remember his best blends.
Taking great food photos comes down to three things: light, composition, and a few quick edits . You don’t need a fancy camera, either. Your phone is more than...
Taking great food photos comes down to three things: light, composition, and a few quick edits. You don’t need a fancy camera, either. Your phone is more than capable of turning a disappointing snap into a vibrant image that actually tells the story of your meal.
Turn Your Food Snaps into Lasting Memories
Have you ever looked back at a photo of a fantastic meal and thought, "Ugh, this just doesn't do it justice"? It’s a feeling every food lover knows. The flat lighting, the awkward angle, or the cluttered background can make an unforgettable dish look completely forgettable.
This guide is designed to fix that. We're not going to get bogged down with expensive gear or complicated software. Instead, we’ll walk through the simple, practical techniques that make the biggest difference. You'll learn how to find great light anywhere, arrange your plate to tell a story, and apply quick edits that make your food look as incredible as it tasted. These are the fundamentals that turn a basic picture into a cherished memory.
Think of this as your playbook for building a visual diary of your culinary journey. Each photo becomes more than just a picture; it’s a record of a discovery, a moment shared, or a tradition celebrated.
The goal here is to help you create photos worthy of a permanent spot in your Savor food diary. Because when you learn how to take better food photos, you're not just improving a skill—you're getting better at documenting your life's most flavorful moments. This collection allows you to track tastes and compare experiences with total confidence. For more ideas on how to organize these memories, check out our guide on creating themed photo albums for your food journey.
Ultimately, a great food photo does more than just look good; it brings you right back to the table. It helps you recall the specifics—the perfect char on a pizza crust, the rich color of a bolognese, or the delicate layers of a pastry. Let's get started on capturing those details, one delicious shot at a time.
Mastering Light: The Secret Ingredient for Great Photos
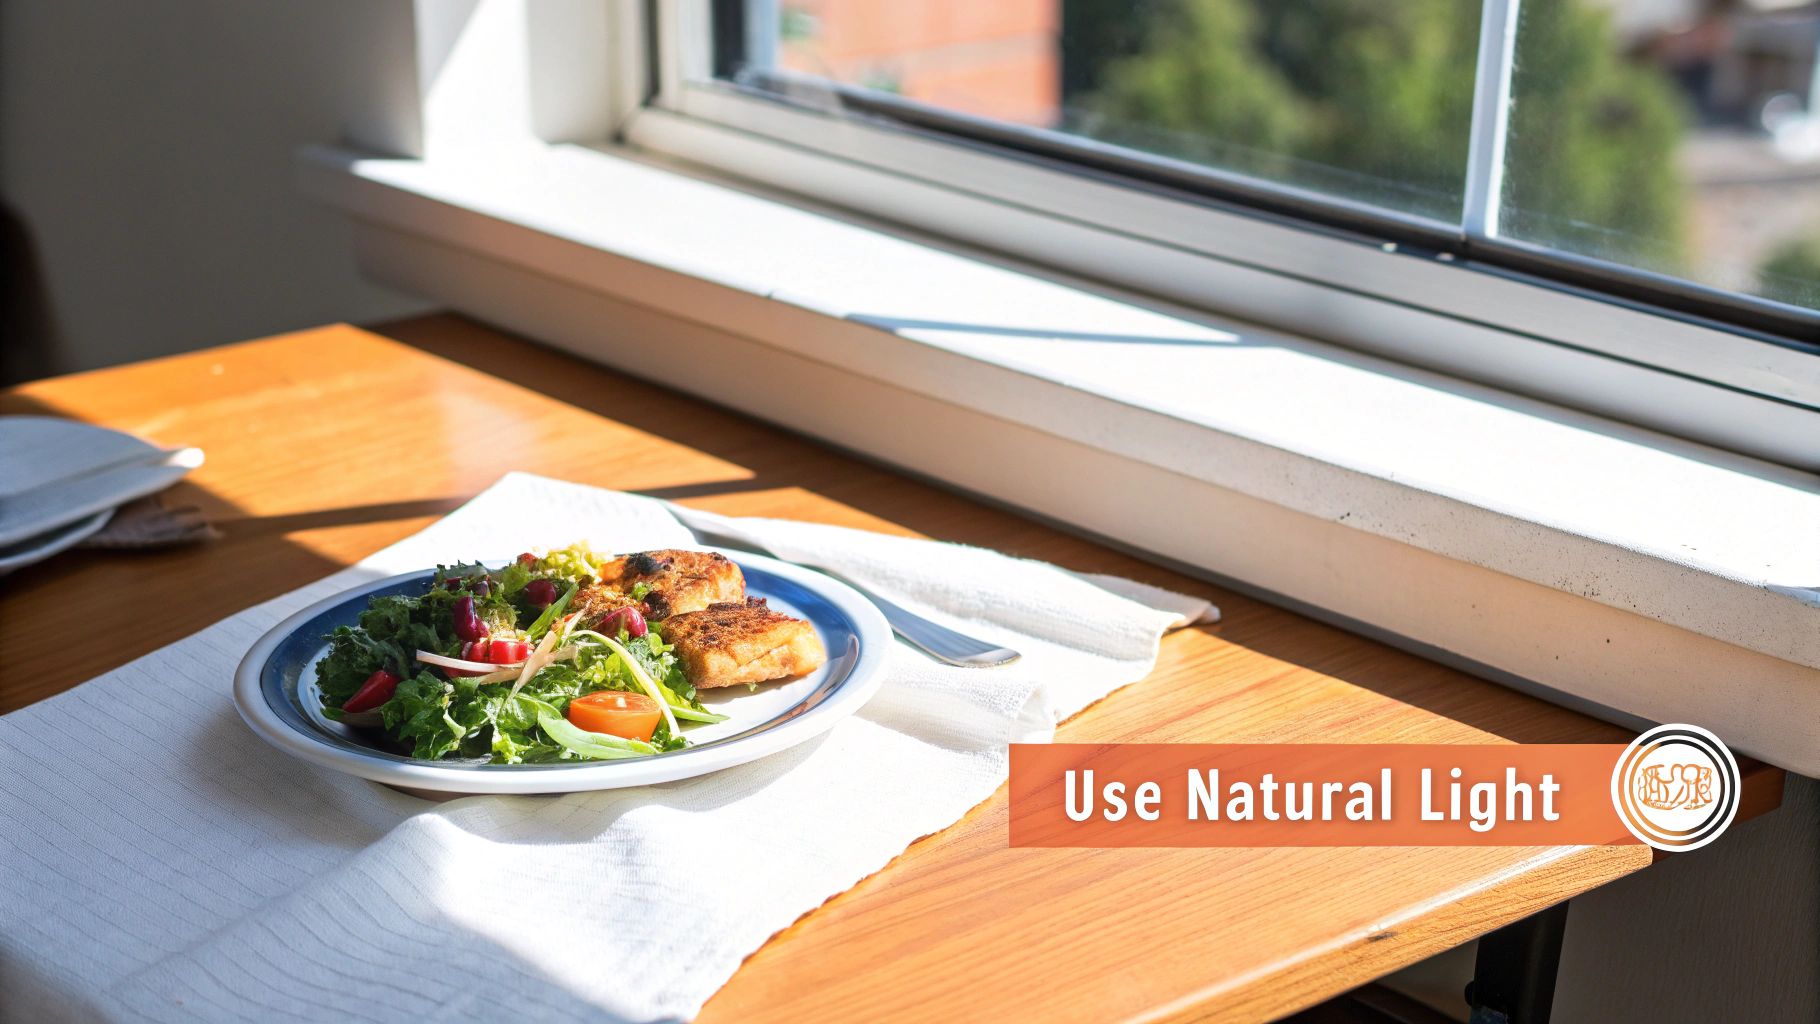
If there's one single thing that separates a drool-worthy food photo from a dull one, it's light. It's the most powerful tool you have, and the best part is, the most effective light source is completely free.
Before you even think about angles or styling, your first mission is always to find the best natural light you can. This means grabbing the window seat at a restaurant or setting up your shot near a window at home. Natural light has a softness that makes food look fresh, vibrant, and incredibly appetizing. It reveals texture—the flaky layers of a croissant, the juicy pulp of a tomato—in a way that artificial light just can't replicate.
Your phone's built-in flash, on the other hand, is the sworn enemy of good food photography. It blasts your dish with harsh, direct light, creating weird color casts, unflattering glares, and deep, dark shadows. The result is a photo that looks flat, greasy, and just plain unappealing. Disabling the flash is non-negotiable.
Working With Different Types of Natural Light
Not all daylight is created equal, and understanding the subtle differences can dramatically improve your photos. The holy grail for most food shots is soft, diffused light—the kind you find on a slightly overcast day or from a window that isn't getting blasted by direct sun.
This gentle light wraps around your food, minimizing harsh shadows and creating a clean, professional look. It's forgiving and flattering for almost any dish.
Direct sunlight is a bit more challenging but can create some stunningly dramatic scenes. It produces high contrast with bright highlights and deep shadows, which can add a ton of mood and atmosphere. To handle that intensity, try shooting from the side (sidelighting) to emphasize texture without completely blowing out the highlights on top of the food.
Key Takeaway: Always try to position your dish so the light source comes from the side or behind it. Backlighting makes drinks glow and steamy dishes look even more inviting, while sidelighting carves out beautiful textures and depth. Avoid having the main light source behind you, as this lights your food head-on, making it look flat.
Simple Tricks for Low-Light Situations
What about that cozy, dimly lit restaurant where natural light is nowhere to be found? It's a classic challenge, but you still have options that don’t involve that dreaded flash. Your goal is to find or create a soft, directional light source.
First, scan the room for any ambient light you can use. Is there a candle on the table, a stylish pendant lamp overhead, or a softly lit bar in the background? Try to position your dish to catch some of that light. It might not be as bright as daylight, but it will add atmosphere.
If the environment is just too dark, you can create your own light source with a tool everyone has. Ask a friend to turn on their phone's flashlight and hold it a few feet away, shining on the dish from the side. Never point it directly down from above.
To take it a step further, you can soften that harsh beam by holding a white napkin in front of your friend's flashlight. This diffuses the light, creating a much softer effect that mimics a professional softbox. It's a simple hack that makes a world of difference.
Using Everyday Items to Manipulate Light
Once you've found your light, you can easily control it with items you already have on the table. Shadows add depth and drama, but sometimes they can be too dark, hiding important details of your dish. To fix this, you need a "reflector."
Don't worry, this doesn't mean you need fancy equipment. A simple white napkin, a menu, or even a blank piece of paper can work wonders.
- How it Works: Place the white object on the side of the dish opposite your light source.
- The Effect: It will bounce the natural light back onto the plate, gently filling in the dark shadows.
- The Result: Your photo will look more balanced and professional, with all the details of the food clearly visible.
This technique, known as using a bounce card, is a fundamental trick used by professional photographers. Learning how to see and shape light is the core skill in your journey to take better food photos.
For an even deeper dive into this topic, you can explore our detailed guide on creating a simple food photography lighting setup. Mastering this one element will have the biggest impact on your images, guaranteed.
Arranging Your Shot with Simple Composition and Styling
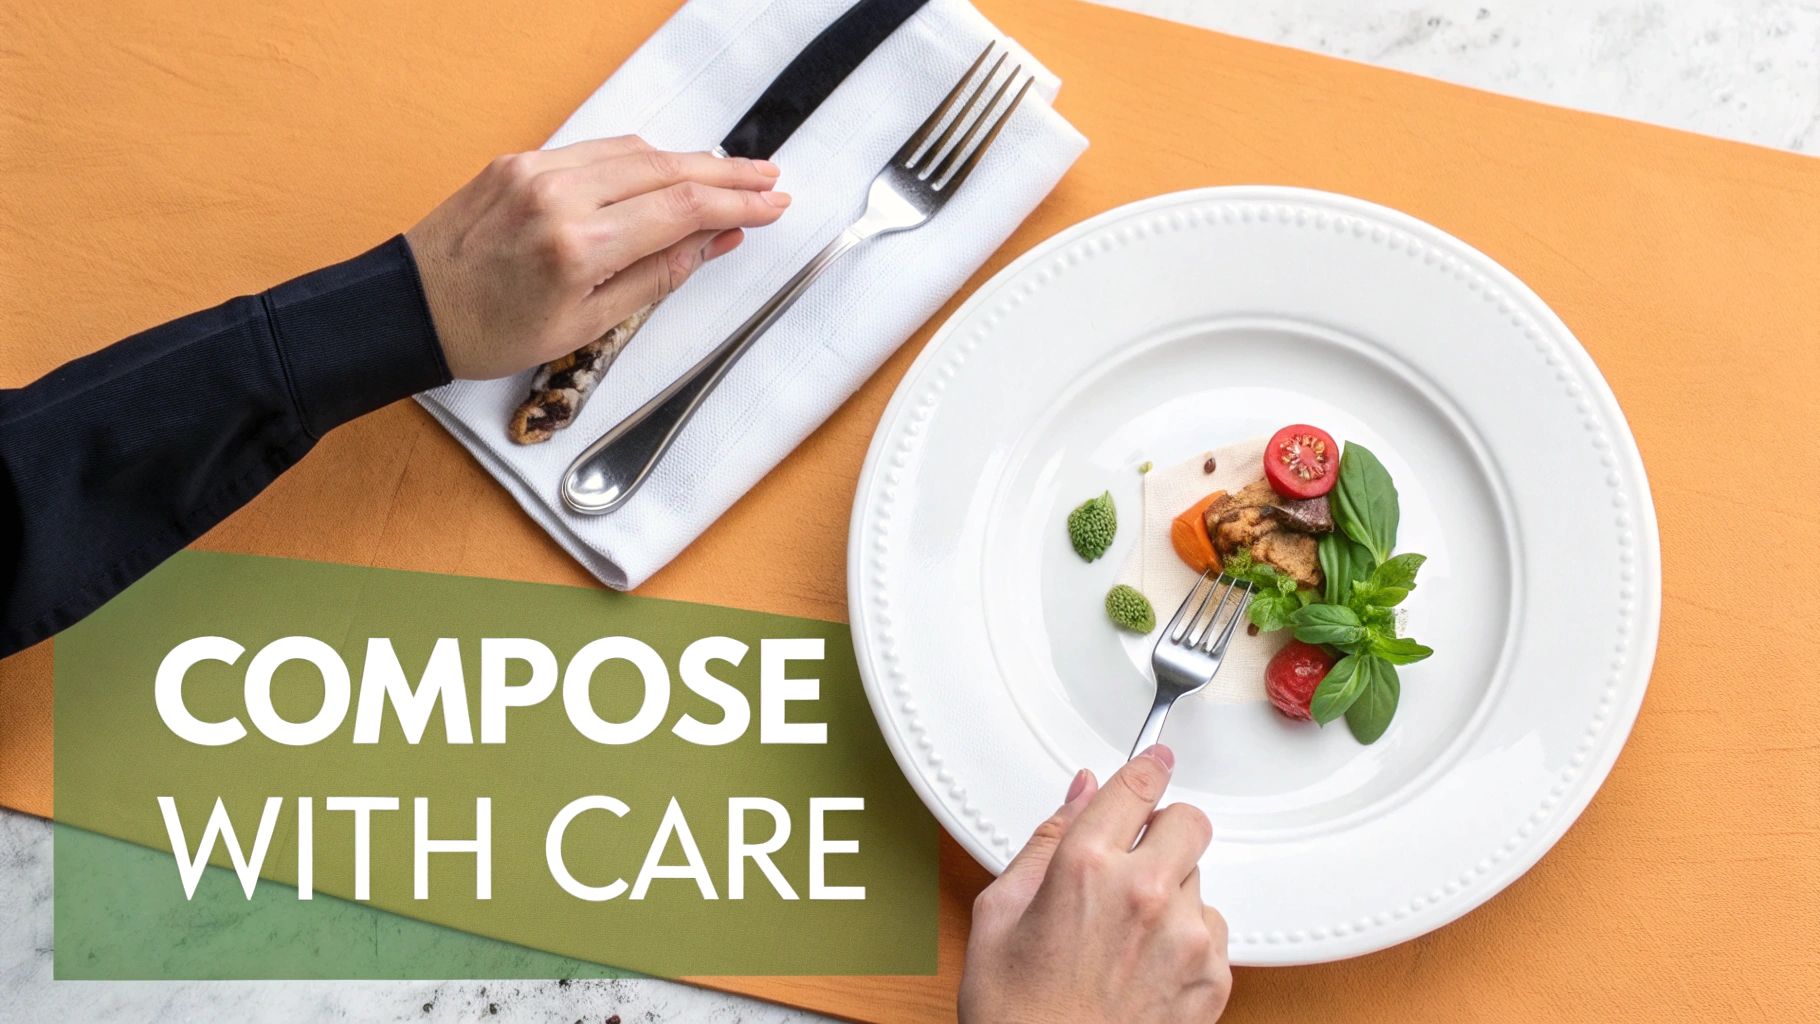
Once you've found that perfect pocket of light, it's time to set the stage. This is where you move from just taking a picture to actually telling a story with your food. Composition isn’t some intimidating artistic concept; it's simply the way you arrange everything in the frame to make the dish look as good as it tastes.
You don't need a suitcase full of props or a professional food stylist on standby. It really just comes down to a few intentional choices about where you place the food and what you let into the background. Your goal is simple: make the main dish the undeniable hero of the shot.
Build a Strong Foundation with the Rule of Thirds
One of the easiest yet most powerful composition tricks in the book is the Rule of Thirds. Picture your phone's screen with a tic-tac-toe grid laid over it. In fact, most phone cameras have a setting to turn these gridlines on—do it now. It’s a game-changer.
The idea is to avoid placing your subject smack in the center. Instead, position the most interesting part of your dish—that perfect swirl of pasta, the glossy cherry on a slice of cake—along one of the lines or, even better, where two lines intersect. This simple shift away from the center creates a more dynamic, balanced, and professional-looking photo. It feels more natural and less like a stiff, posed portrait.
Use Negative Space to Make Your Dish Pop
Sometimes, what you leave out of the photo is just as important as what you put in. Negative space is just a friendly term for the empty area around your main subject. A common mistake is trying to cram every inch of the frame with stuff, which just makes the photo feel cluttered and chaotic.
Give your plate some breathing room. Let a clean tabletop, a simple placemat, or an uncluttered background frame your dish. This draws the viewer's eye exactly where you want it to go: right to the food. Don't be afraid of a little emptiness; it's one of the most effective tools for creating focus and giving your photos a clean, polished feel.
Styling on the Fly with Everyday Items
Styling doesn't mean you need to get complicated. It’s really about adding a few small details to create a sense of place and atmosphere. You want the scene to feel authentic and lived-in, not like a sterile studio shot.
Here are a few props you can almost always find right at your table:
- Cutlery and Napkins: A fork resting by the plate or a casually folded napkin adds texture, lines, and a subtle human element. It helps frame the dish and suggests a meal is about to be enjoyed.
- A Drink: A glass of wine, a cup of coffee, or even a simple glass of water adds another layer to the scene. It introduces different shapes and colors, making the whole composition feel more complete.
- The Human Touch: Including a hand in the frame—reaching for a glass, holding a fork, or sprinkling a final garnish—instantly makes a photo more dynamic and relatable. It brings the image to life.
Quick Tip: Before you shoot, do a quick "table sweep." Wipe away any crumbs or smudges from the plate's rim and move distracting items like salt shakers or crumpled wrappers out of the frame. A clean, intentional setup makes a world of difference.
Many of these same principles apply beyond still photos. If you're interested in making your food look great on video, too, check out these tips for creating compelling product visuals—the core ideas of creating an appealing scene are universal.
Finding the Most Flattering Angle for Your Food
The angle you shoot from can completely change the vibe of your photo. Moving your camera just a few inches up or down is often the difference between a flat picture and a dynamic shot that makes the dish look incredible. It’s a simple shift with a massive impact on the story your photo tells.
So, get moving. Don’t just snap a picture from where you’re sitting. The best food photos happen when you experiment with different perspectives to find the one that truly highlights the food's best features. Is it a towering, layered cake? A flat pizza with gorgeous toppings? A deep, comforting bowl of soup? Each one has a hero angle that makes it shine.
Learning the three fundamental angles in food photography gives you a simple but powerful toolkit. Once you know when to use each one, you’ll be able to quickly figure out how to best capture any meal you come across.
The Reliable 45-Degree Angle
This is the trusty workhorse of food photography. The 45-degree angle is shot from a perspective that feels natural—it’s pretty much how you see the dish when you’re sitting down to eat. That familiarity makes it feel inviting, so it’s a fantastic starting point for almost any food photo.
This angle works so well because it captures both the top surface and the side of the dish, giving it a real sense of depth and dimension. It's perfect for showing off the juicy texture of a steak, the flaky crust of a pie, or the comforting tangle of a bowl of pasta. When in doubt, start here.
The Trendy Overhead Flat Lay
The overhead shot, also known as a flat lay or top-down view, is everywhere for a good reason. Shooting directly from above (a 90-degree angle) transforms your dish into a graphic composition of shapes, colors, and textures. It's a clean, modern, and incredibly effective way to showcase certain types of food.
This perspective is a game-changer for dishes that are flat and best appreciated for their patterns and toppings. Think pizzas, sprawling charcuterie boards, vibrant salads, and beautifully arranged smoothie bowls. It's also the perfect way to capture an entire table setting, showing multiple dishes and drinks together to tell the story of a shared meal.
Pro Tip: For a perfect overhead shot, make sure your phone is completely parallel to the table. Even a slight tilt can distort the shapes in your photo. Pop on your camera’s gridlines to help you line everything up perfectly.
The Dramatic Straight-On Shot
For any dish with impressive height and layers, the straight-on angle is your best friend. This means getting your camera right down to table level and shooting the food from the side (a 0-degree angle). This perspective makes the subject feel grand and heroic, putting all the emphasis on its structure.
This is the best way to capture:
- Tall Foods: A towering burger piled high with toppings, a multi-layered cake, or a fluffy stack of pancakes.
- Drinks: It beautifully showcases the shape of the glass and any garnishes, like a sprig of mint or a slice of lime on the rim.
- Action Shots: This angle is unbeatable for capturing a drip of syrup, a dusting of powdered sugar, or an epic cheese pull.
Before you take your final shot, move your phone around the plate—from the side, up to a 45-degree view, and then directly overhead. You’ll quickly see which perspective tells the most delicious story for that specific meal.
Choosing the right angle becomes second nature with a little practice. To make it even easier, here’s a quick reference table to help you decide on the fly.
Choosing the Right Angle for Your Dish
| Camera Angle | Best For These Dishes | Pro Tip |
|---|---|---|
| Overhead (90°) | Pizza, charcuterie boards, salads, soup, smoothie bowls, table scenes. | Use your camera's gridlines to ensure your phone is perfectly parallel to the table to avoid distortion. |
| 45-Degree | Pasta in a bowl, steaks, pies, curries, most everyday dishes. | This is your go-to, versatile shot. It feels natural and shows both the top and side of the dish for depth. |
| Straight-On (0°) | Burgers, sandwiches, stacked pancakes, layer cakes, cocktails. | Get low! This angle makes tall food look heroic and is perfect for capturing drips, layers, or action shots. |
Thinking through these three options before you shoot will dramatically improve your photos. You'll start to see your food not just as a meal, but as a subject with its own best side.
Your Five-Minute Editing Workflow for Delicious Photos
Taking a great photo is really only half the battle. Editing is that final, crucial step where you polish the image and make the food look just as vibrant and delicious as you remember it. Don't worry, this doesn't mean you need complicated software or hours of tweaking. A simple, five-minute workflow using your phone’s built-in editor is all it takes to make your pictures pop.
The goal here isn't to completely change the photo, but to enhance it. You want the food to look like an elevated version of itself—true to life, just better. We recommend avoiding those heavy, stylized filters that can give food an unnatural color cast. Instead, let's focus on a few key adjustments that bring out the best in your image. A subtle touch goes a very long way.
The Essential Editing Toolkit
Think of your editing process like a quick four-step recipe. These adjustments, which you'll find in virtually any photo editing app, are the foundation of a fantastic food photo. We'll walk through each one, focusing on small, intentional tweaks.
Brightness (Exposure): This is always my starting point. Was the scene a little dark? Gently slide the brightness up until the dish is well-lit but not washed out. Be careful not to go too far, as you can lose important details in the brightest parts of the photo—this is what photographers call "blowing out the highlights."
Contrast: This adjustment is your secret weapon for adding a bit of drama. It makes the dark parts of your photo darker and the light parts lighter. A small boost in contrast can make textures stand out beautifully, adding depth and making the image feel more dynamic. It’s perfect for emphasizing the char on a grilled steak or the beautiful crispy bits on fried chicken.
Warmth (Temperature): Here's a pro tip: food almost always looks more appetizing when it has a slightly warm tone. A tiny nudge of the warmth slider can make pastries look more golden, sauces look richer, and the entire scene feel more inviting. Just a little goes a long way here; you want a cozy glow, not an orange-tinted photo.
Sharpness: The final touch is a little bit of sharpening. This enhances the fine details and textures in your food, making everything look crisp and clear. This is especially effective for highlighting the crumb of a cake or the individual grains of rice in a dish. Just don't overdo it, or the image will start to look grainy and unnatural.
By focusing on these four simple adjustments, you create a repeatable workflow that consistently improves your food photos. The secret is subtlety—small changes in each category add up to a big impact, making your dish look fresh, vibrant, and incredibly appealing.
The infographic below shows how different camera angles—overhead, 45-degree, and straight-on—can change the entire feel of your photo before you even get to editing.
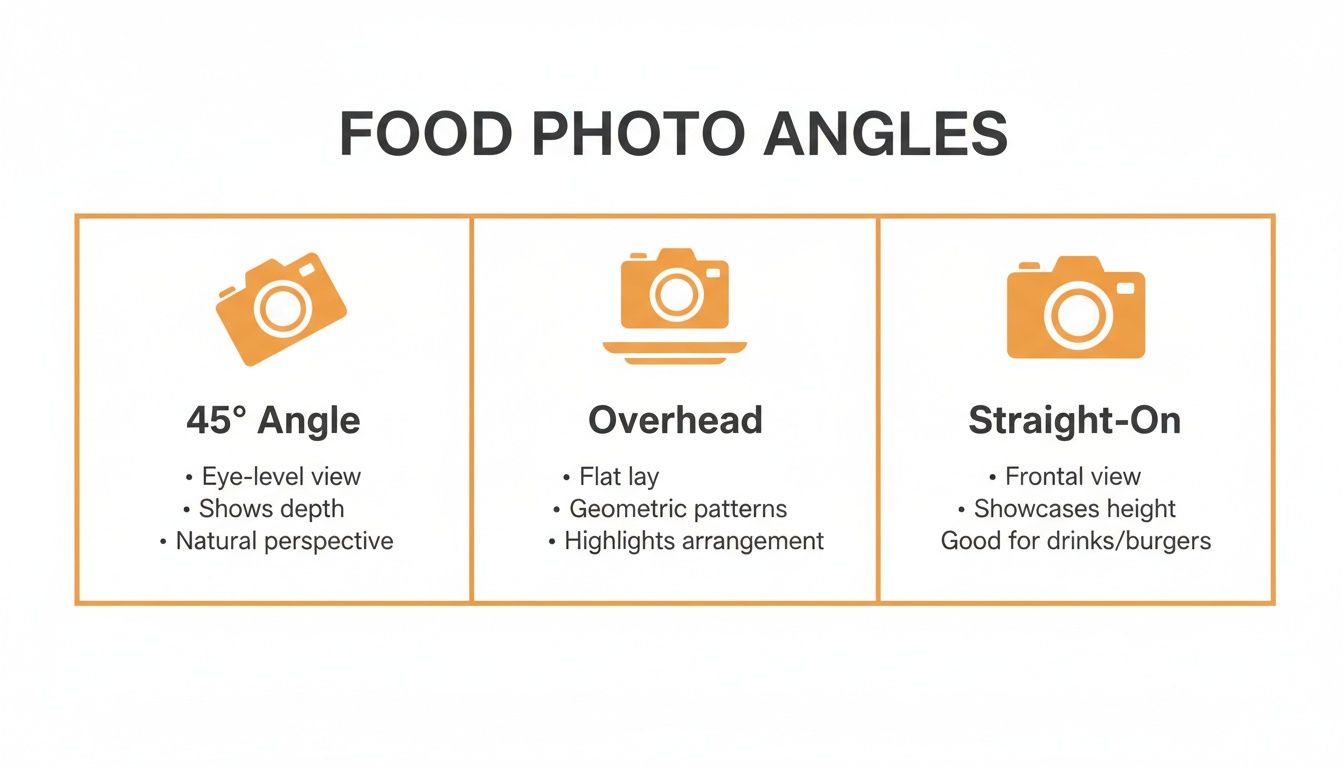
This visual guide is a great reminder that your initial shot composition is the foundation for your final, edited masterpiece. Once you've got these quick edits down, you'll be ready to capture every delicious memory with confidence.
Bringing Your Food Memories Together in Savor
Okay, so you've just captured a truly spectacular photo of your meal. Now what? A great picture is a fantastic start, but its real power is in bringing a memory back to life. This is where your new photography skills meet the art of preservation, turning a fleeting moment into a lasting, searchable part of your personal food story.
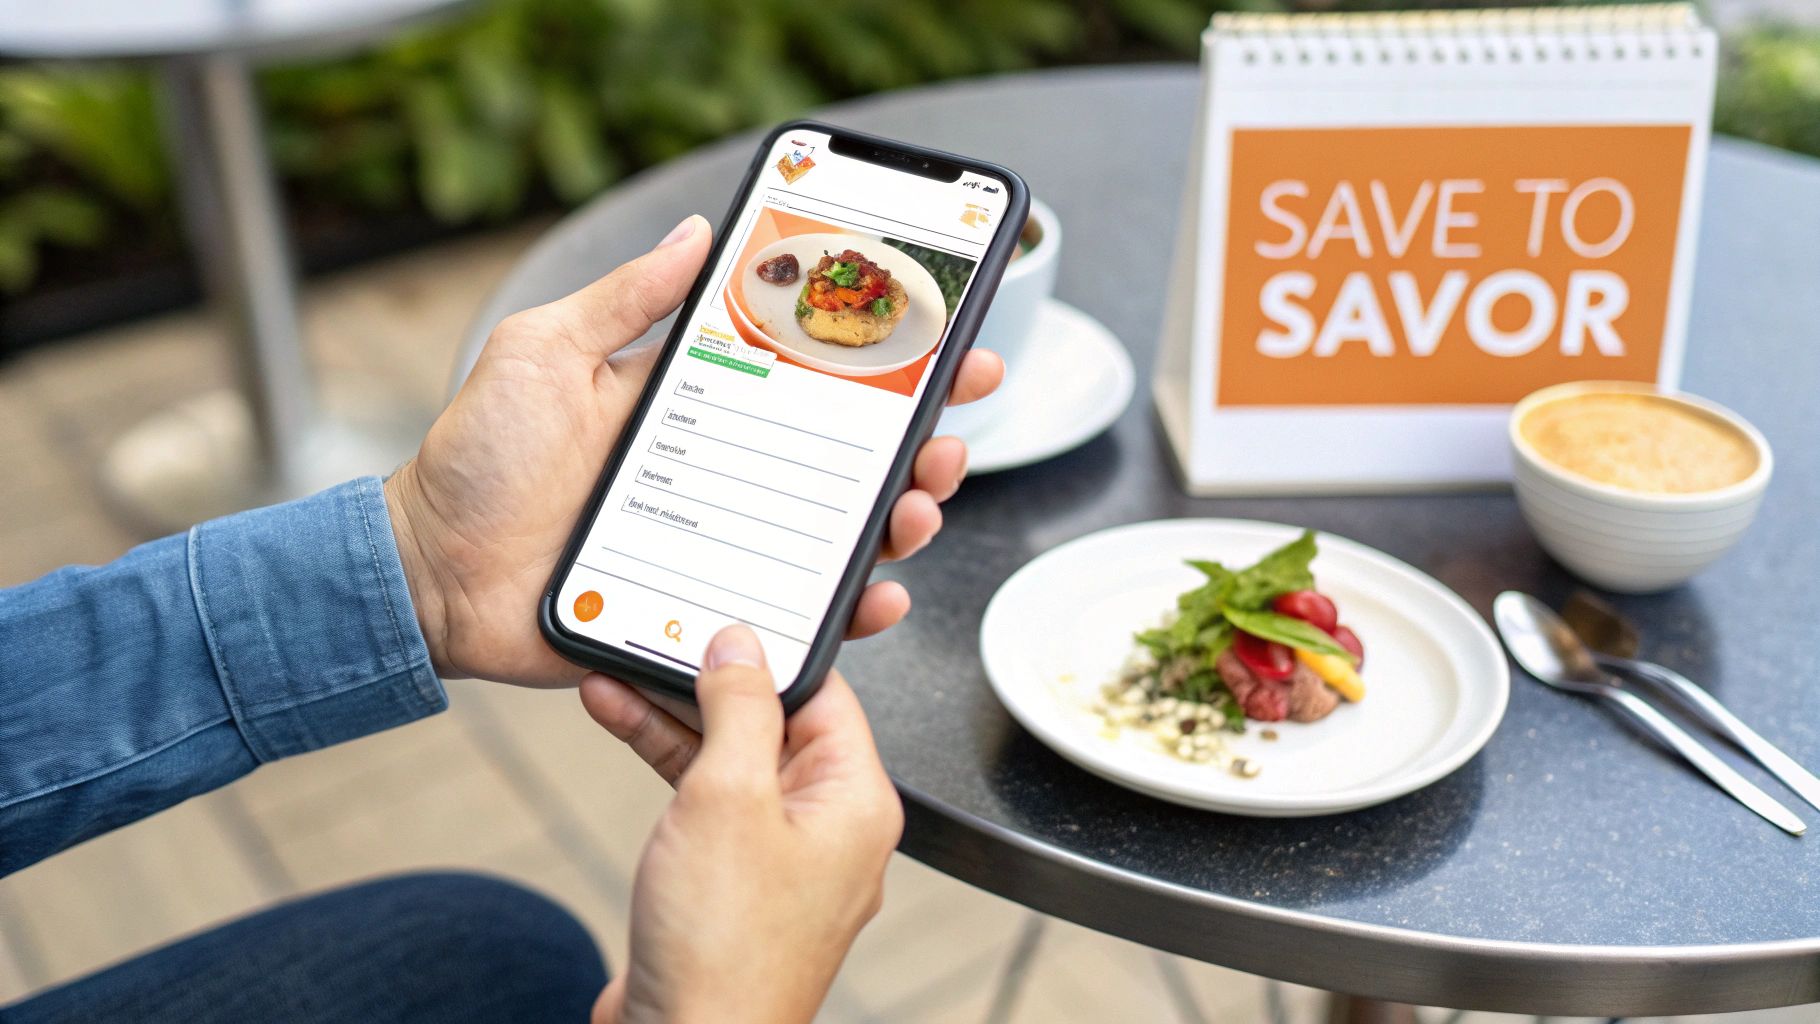
Instead of letting your best shots get lost in a chaotic camera roll, Savor gives them a proper home. It’s a private, organized food diary designed to grow with every meal you enjoy, built on a simple idea: Track tastes, share discoveries.
Building Your Personal Food Database
Think of Savor as your visual culinary database. Each entry you create is far more than just a photo; it becomes a complete record of a taste, a place, and a moment in time. The process is simple but incredibly powerful.
- Upload Your Best Shot: Start by adding your newly edited photo directly into the app. This image becomes the visual anchor for the entire memory.
- Rate like a critic: Give the dish a score. Was it a life-altering 10/10 carbonara or a decent but forgettable 6/10 sandwich? Your personal rating system is what helps you compare experiences over time.
- Add Your Notes: Jot down the details that matter. What did it taste like? Who were you with? What made it so special? These notes are for your eyes only—a private log of your culinary adventures.
This organized approach means you can finally answer questions like, "Where was that amazing ramen I had six months ago?" in seconds. Savor makes your food memories instantly accessible and useful.
Once you've captured and perfected your food memories, you’ll be ready to share them. You could use a social platform's upload feature to showcase your delicious creations. The impact of a great photo is undeniable; research shows that 74% of people use social media to decide where to eat.
With Savor, you’re not just taking pictures—you're building an invaluable, personal guide to your own palate. For a deeper look into this, check out our guide on the benefits of using a photo food journal app.
Your Top Food Photography Questions, Answered
Even with all the right techniques, a few tricky questions always seem to pop up. Let's tackle some of the most common hurdles you'll face so you can shoot with confidence.
Do I Really Need a Fancy Camera?
Honestly? Absolutely not. Your smartphone is more than capable of taking incredible food photos.
The real secret isn't the gear; it's learning to see. The principles we've covered—finding good light, composing a strong shot, and making simple edits—are infinitely more important than the camera you use. A stunning photo comes from the choices you make behind the lens, not the price tag on your equipment.
How Do I Shoot in a Dark Restaurant?
This is the big one, the ultimate challenge for any food photographer. But don't worry, you have options that don't involve that awful, food-ruining flash.
First, and we can't say this enough, never use your phone's built-in flash. It blasts your dish with harsh, direct light, making everything look greasy and flat. It's the fastest way to make beautiful food look unappetizing.
Instead, try one of these simple tricks:
- Hunt for Ambient Light: When you're being seated, ask for a table near a window, a cool decorative lamp, or even just a candle. Any little pocket of soft light is your best friend.
- Use a Friend's Phone: This is my go-to move. Ask your dining companion to turn on their phone's flashlight and hold it a few feet away, aiming at the side of the dish—never directly from above.
- Soften That Light: A naked phone flashlight can still be a bit harsh. To fix this, just have your friend shine the light through a white napkin. This instantly diffuses the beam, creating a much softer, more flattering glow that brings out the food's texture without creating ugly shadows.
What Are the Biggest Mistakes I Should Avoid?
Most "bad" food photos are the result of a few common mistakes that are surprisingly easy to fix once you know what to look for. Nail these, and you'll see an immediate improvement.
The three cardinal sins of food photography? Using the on-camera flash, having a cluttered and distracting background, and over-editing your photos with unnatural filters.
Always start by finding the best light you can—soft and natural is the goal. Before you take the shot, take just one second to move that extra fork, crumpled napkin, or salt shaker out of the frame. A clean scene makes a world of difference.
Finally, when you get to editing, remember that your goal is to enhance, not to transform. The food should still look like itself, just the best possible version of it.
Ready to turn those beautiful new photos into your own searchable food diary? Savor is the place to save every shot, add your personal rating, and build a collection of your culinary journey. Rate like a critic and start tracking your tastes today.