8 Fun & Easy No Cook Recipes for Kids To Make in 2025
Getting kids involved in the kitchen is about more than just making a meal; it's about creating memories, building confidence, and sparking a lifelong curiosity about food. But you don't need a hot stove or a complicated appliance to start. This guide shares creative, delicious, and completely heat-free recipes that empower children to take the lead safely. From vibrant breakfasts to satisfying snacks, these no cook recipes for kids are a perfect way to start documenting your family's food stories.
Think of each recipe as a chance for your little ones to become food critics in their own right. They can track their favorite combinations, rate their creations, and build a private food diary of their culinary discoveries. This collection moves beyond just ingredients and steps; it focuses on hands-on experiences that teach valuable skills without any of the risks associated with heat.
We'll explore a variety of dishes that are as fun to make as they are to eat. You'll find practical ideas for:
- Breakfasts: Fun ways to start the day with yogurt parfaits and smoothie bowls.
- Lunches & Snacks: Creative sandwich art, veggie platters, and energy bites.
- Desserts: Simple, sweet treats that come together in minutes.
Each item includes age-appropriate task suggestions, allergy-friendly swaps, and tips for turning mealtime into an adventure. Let’s dive into simple dishes that make every meal a memory worth tracking.
1. No-Cook Caprese Skewers
No-cook Caprese skewers are a classic and surprisingly simple way to introduce children to fresh ingredients and basic assembly skills. This Italian-inspired recipe involves threading cherry tomatoes, fresh mozzarella balls, and basil leaves onto small skewers. It's an excellent entry point for teaching kids about flavor pairing, where the acidity of the tomato, the creaminess of the cheese, and the sweetness of basil create a balanced bite.
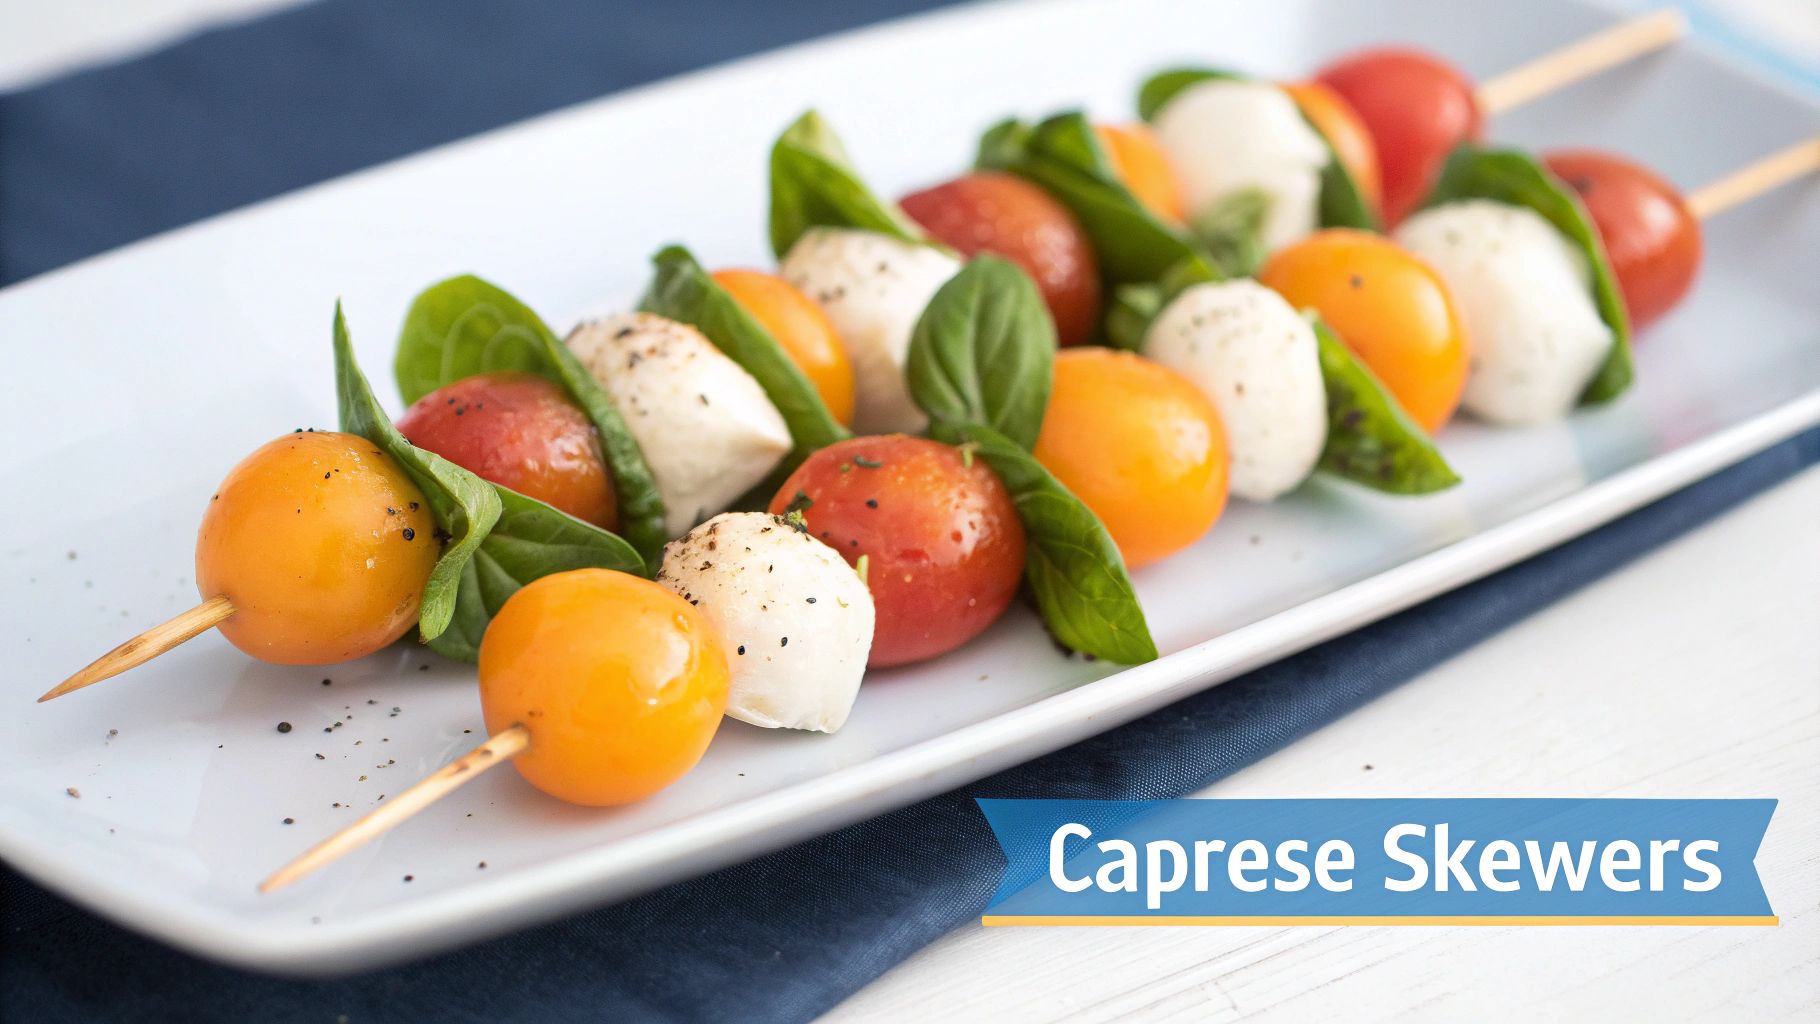
This recipe shines as one of the best no cook recipes for kids because it's entirely hands-on, safe for all ages, and visually rewarding. The vibrant red, white, and green colors are inherently appealing, and the repetitive motion of threading ingredients helps develop fine motor skills. It’s a perfect activity for a quiet afternoon snack, a healthy party appetizer, or a light lunch component.
Skill & Age Guidance
- Ages 3-5: Toddlers and preschoolers can wash tomatoes, pick basil leaves, and help pat ingredients dry with a paper towel. They can also practice counting the ingredients as you assemble the skewers.
- Ages 6-8: Young children can safely handle blunt-tipped bamboo or plastic skewers. They are capable of threading the ingredients themselves, learning to create a consistent pattern.
- Ages 9+: Older kids can take the lead on the entire process, including arranging the finished skewers on a platter and even drizzling them with a bit of balsamic glaze for an extra touch of flavor.
Allergy-Friendly Swaps
Making these skewers inclusive is straightforward with a few simple substitutions:
- Dairy-Free: Replace mozzarella with a vegan mozzarella alternative. You can also use cubes of firm tofu marinated in a light vinaigrette.
- Nightshade Sensitivity: If tomatoes are an issue, swap them for chunks of ripe cantaloupe, honeydew melon, or even seedless cucumber for a refreshing twist.
Packing & Storage Tips
Caprese skewers are best enjoyed fresh but can be prepared a few hours in advance and stored in an airtight container in the refrigerator. To pack for lunch, lay them flat in a bento-style box to prevent them from getting squished. Keep them in an insulated lunch bag with an ice pack to maintain freshness.
2. DIY Yogurt Parfait Bowls
DIY yogurt parfait bowls are an engaging and delicious way to empower children in the kitchen, teaching them about layering textures and flavors. This simple activity involves setting up a station with yogurt, granola, and fresh fruits, allowing kids to build their own creations. It's a fantastic method for introducing concepts like ingredient combination, as they get to see exactly what goes into their snack.
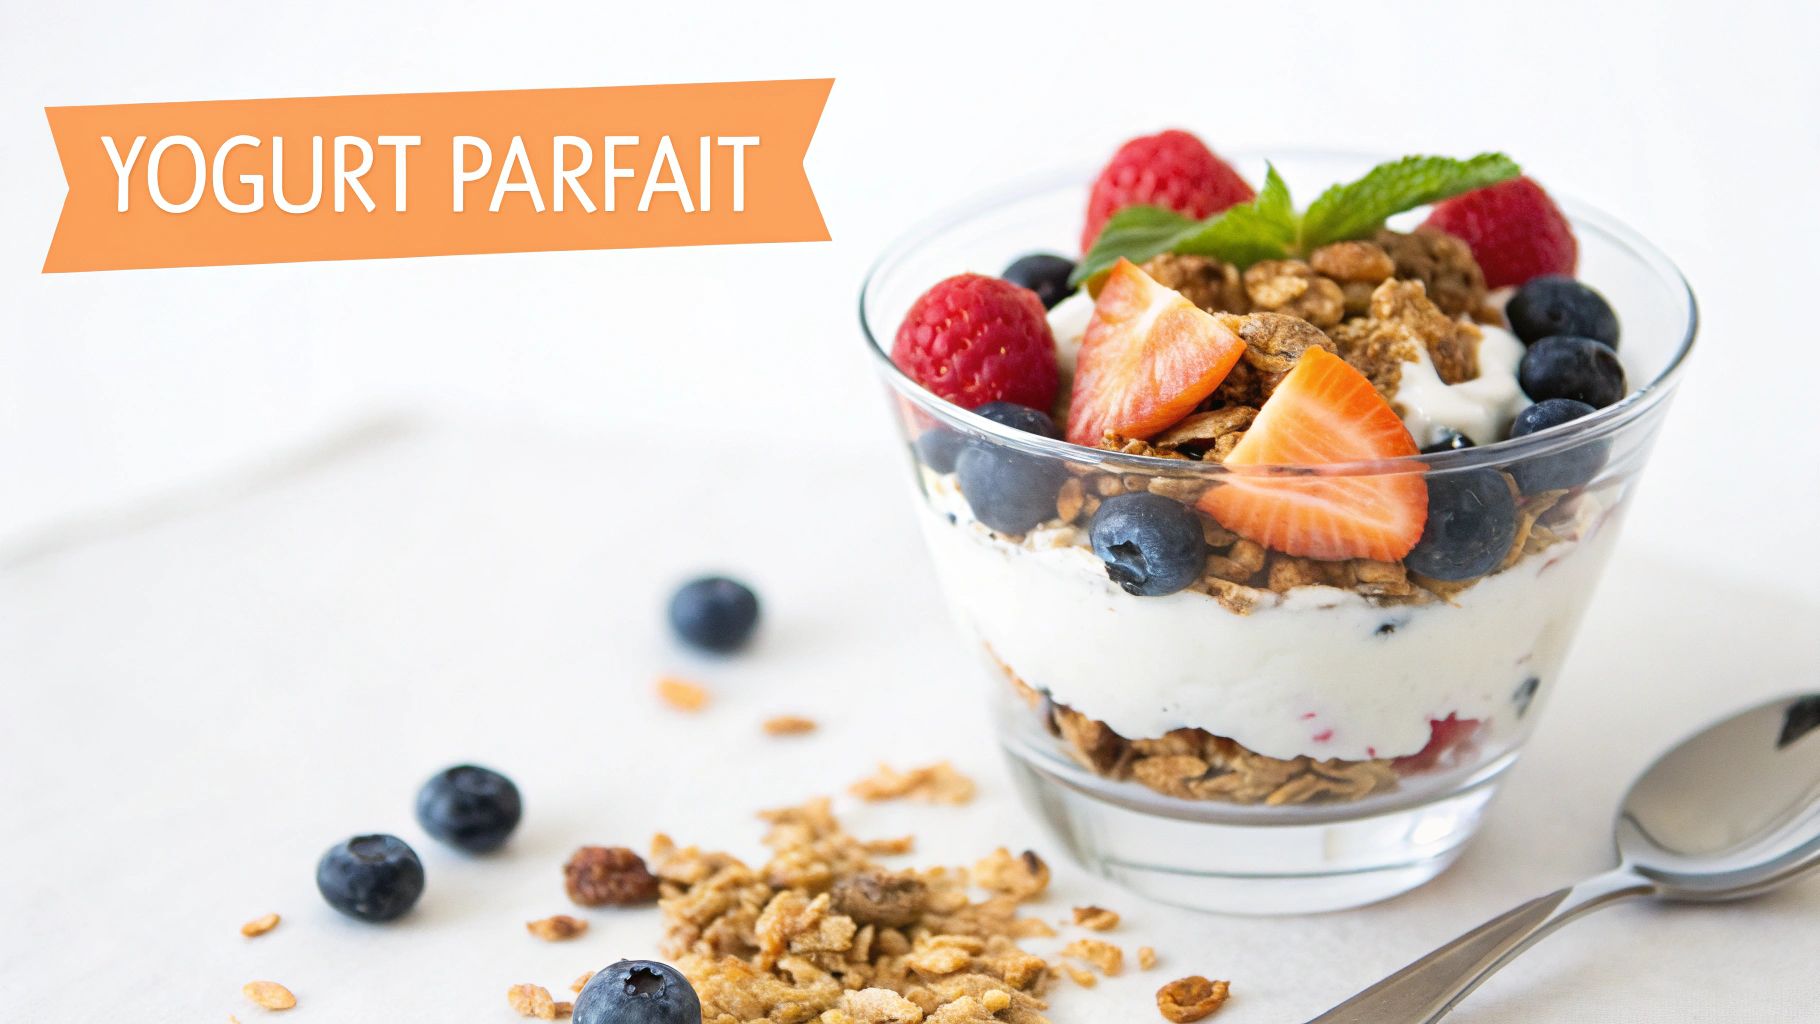
This recipe stands out as one of the best no cook recipes for kids because it encourages creativity and personal choice, making mealtime a fun, interactive experience. The visual appeal of the colorful layers makes healthy ingredients more attractive to young eaters. Whether for a quick breakfast or a nutritious after-school snack, parfaits are endlessly customizable and help develop a child's confidence.
Skill & Age Guidance
- Ages 3-5: Toddlers can use spoons to scoop yogurt and toppings into their bowls. They can also help wash berries and arrange the pre-portioned ingredients on the counter.
- Ages 6-8: Young children can handle scooping and layering independently. They can also slice soft fruits like bananas or strawberries with a child-safe knife under supervision.
- Ages 9+: Older kids can manage the entire process, from preparing fruits to creating complex layers. They can even create and log their favorite combinations in a private food diary, turning a simple snack into a fun food-tracking project.
Allergy-Friendly Swaps
Adapting parfaits for different dietary needs is simple:
- Dairy-Free: Use a plant-based yogurt made from coconut, soy, almond, or oat milk.
- Gluten-Free: Choose a certified gluten-free granola or use a mix of seeds, nuts (if no nut allergies), and toasted puffed rice.
- Nut-Free: Ensure the granola is nut-free and use toppings like sunflower seeds, pumpkin seeds, or toasted coconut flakes for crunch.
Packing & Storage Tips
Yogurt parfaits are best assembled just before eating to keep the granola crunchy. For a packed lunch, pack the yogurt, fruit, and granola in separate compartments of a bento-style box. Keep the container in an insulated lunch bag with an ice pack. If you must pre-assemble, place the granola on top to minimize contact with the yogurt.
3. No-Cook Hummus and Veggie Dip Platters
No-cook hummus and veggie dip platters are a fantastic, deconstructed way to encourage children to explore a variety of fresh vegetables and savory dips. This simple concept involves arranging fresh-cut vegetables like carrot sticks, cucumber slices, and bell pepper strips around bowls of pre-made dips. It's an excellent method for introducing kids to new textures and flavors in a low-pressure, interactive setting.
This platter stands out as one of the best no cook recipes for kids because it promotes autonomy and choice, empowering them to build their own snacks. The vibrant colors of the vegetables are visually stimulating, and the act of dipping is a fun, hands-on activity that develops hand-eye coordination. It’s a perfect solution for a healthy after-school snack or a customizable lunchbox meal.
Skill & Age Guidance
- Ages 3-5: Preschoolers can help wash and dry vegetables, tear lettuce leaves, and arrange pre-cut veggie sticks on a platter. They can also use their fingers to scoop dips into small bowls.
- Ages 6-8: With supervision, young children can use child-safe knives to cut soft vegetables like cucumbers and bell peppers. They can also take charge of arranging the entire platter creatively.
- Ages 9+: Older kids can manage the entire preparation, from selecting dips to slicing a wider variety of vegetables. They can also experiment with creating their own simple dips or arranging the platter with an artistic flair.
Allergy-Friendly Swaps
Customizing a dip platter for dietary needs is incredibly easy due to its flexible nature:
- Gluten-Free: Serve with gluten-free crackers, rice cakes, or corn chips alongside the vegetables.
- Nut/Seed-Free: While hummus often contains tahini (sesame paste), many store-bought versions are sesame-free. Alternatively, use a bean dip or guacamole.
- Dairy-Free: Opt for hummus, guacamole, salsa, or a dairy-free ranch or onion dip made with a plant-based yogurt or sour cream alternative.
Packing & Storage Tips
Dip platters are ideal for meal prep. Pre-cut vegetables can be stored in an airtight container with a damp paper towel to maintain freshness. For lunches, use a bento-style box with separate compartments for dips and veggies to prevent sogginess. An insulated bag with an ice pack will keep everything cool and crisp.
4. No-Cook Fruit Kabobs with Dipping Sauces
No-cook fruit kabobs with dipping sauces are a vibrant, interactive, and healthy way to get children excited about eating fresh fruit. This simple recipe involves threading chunks of colorful fruits like strawberries, melon, and grapes onto skewers, transforming an ordinary snack into a fun activity. It’s an ideal opportunity to teach kids about colors, textures, and natural sweetness.
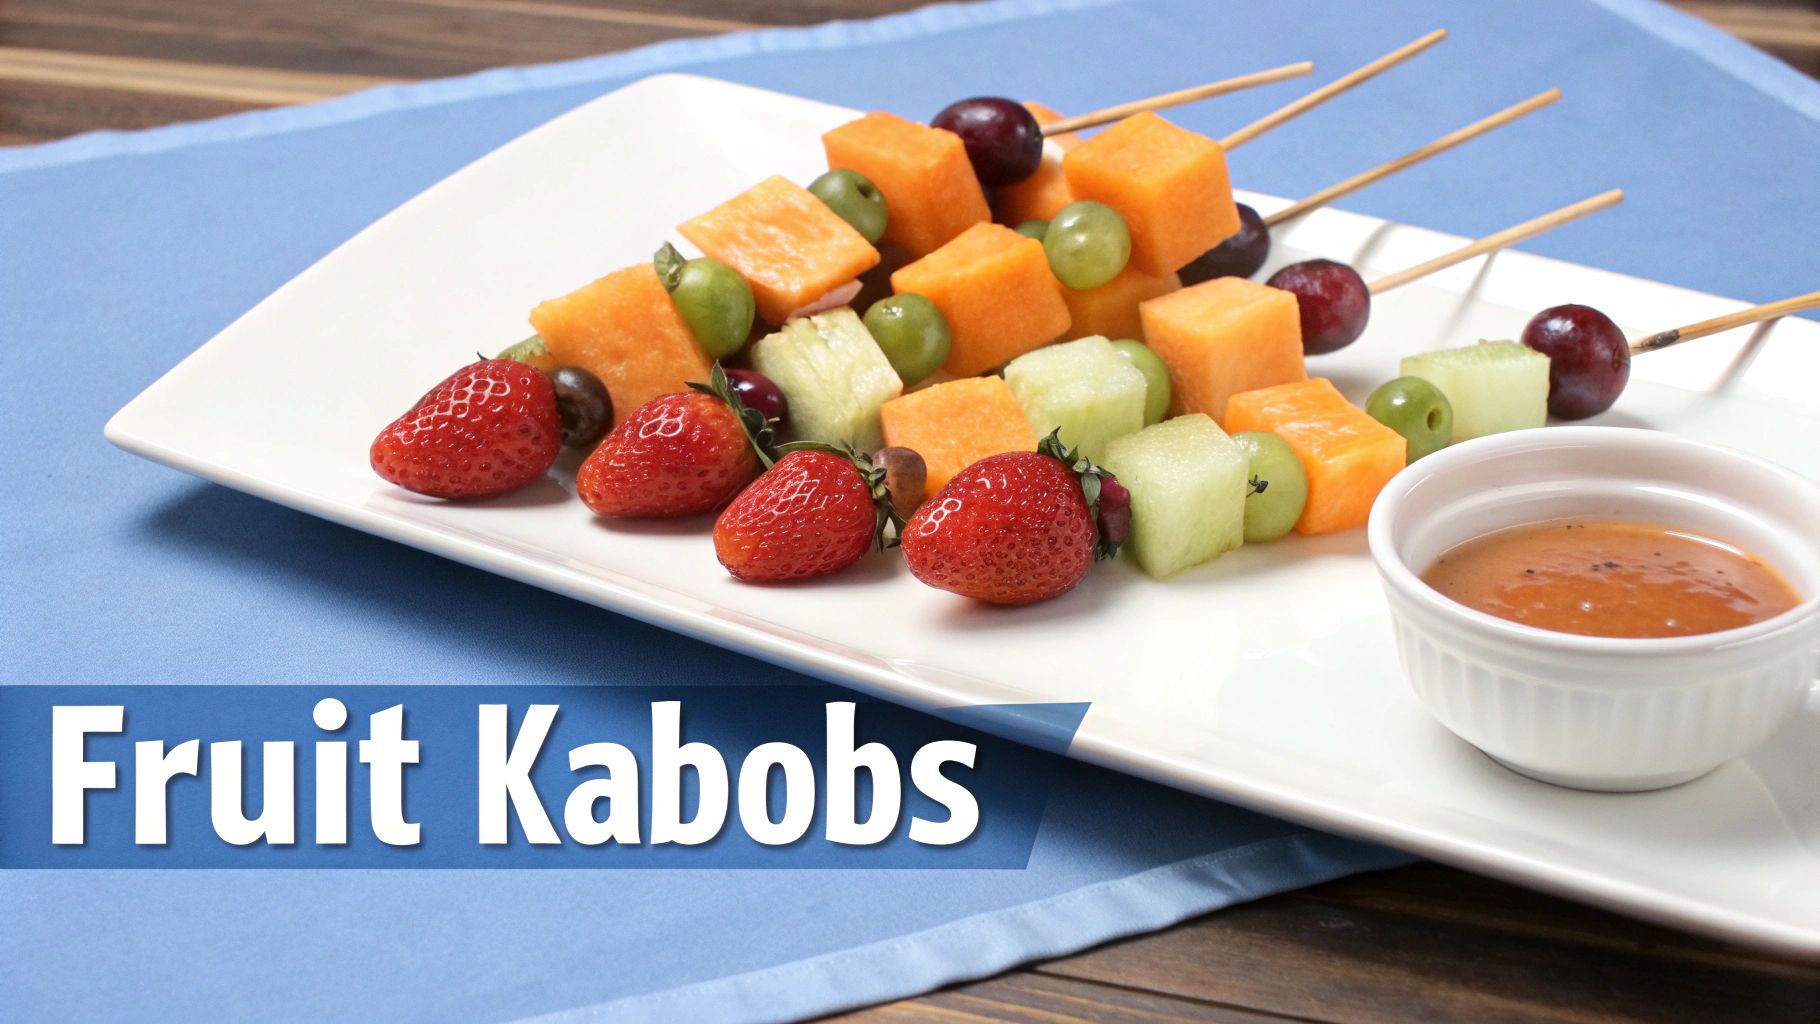
This recipe is a standout among no cook recipes for kids because it is endlessly customizable and empowers children to make their own choices. The process of selecting fruits and creating patterns develops creativity and decision-making skills. These kabobs are perfect for parties or after-school snacks, offering a hands-on approach that builds a positive relationship with food.
Skill & Age Guidance
- Ages 3-5: Toddlers can help wash and dry softer fruits like berries. They can also practice their motor skills by placing pre-cut fruit chunks into a bowl and helping to stir a simple yogurt dip.
- Ages 6-8: School-aged children can safely use blunt-tipped bamboo skewers or sturdy lollipop sticks to thread their own kabobs. This is a great age to introduce pattern-making and sorting fruits by color.
- Ages 9+: Older kids can handle more responsibility, including using a kid-safe knife to slice softer fruits like bananas and melons. They can also take charge of mixing various dipping sauces.
Allergy-Friendly Swaps
Adapting fruit kabobs for different dietary needs is simple, as the core ingredients are naturally inclusive:
- Dairy-Free Dip: Swap the traditional yogurt dip for a coconut or almond-based yogurt. You can also use a dairy-free chocolate hazelnut spread.
- Fruit Allergies: The beauty of kabobs is their versatility. Easily omit any allergenic fruits (like kiwi or strawberries) and substitute with safe alternatives such as peaches, pears, or mangoes.
Packing & Storage Tips
Fruit kabobs are best enjoyed shortly after assembly. To prepare them ahead, cut the fruit and store it in separate airtight containers in the refrigerator. Assemble the kabobs just before serving. For packing in a lunchbox, lay them flat in a bento-style container and include a small, sealed pot for the dipping sauce to prevent sogginess.
5. No-Cook Sandwich Art and Wraps
Transform lunchtime into a creative session with no-cook sandwich art and wraps that let children become food designers. This approach involves laying out a variety of breads, proteins, spreads, and vegetables, allowing kids to assemble their own creations. It’s a fantastic way to teach them about combining different flavors and textures, from the smoothness of cream cheese to the crunch of a cucumber slice.
This idea excels as one of the best no cook recipes for kids because it empowers them with choice and creativity, making them more likely to eat what they’ve made. Using cookie cutters to shape bread and cheese or rolling ingredients into a colorful wrap helps develop fine motor skills and artistic expression. For imaginative mealtime fun, explore our guide to creating a Sandwich Tower Masterpiece activity.
Skill & Age Guidance
- Ages 3-5: Toddlers can use their hands to spread soft ingredients like hummus or cream cheese with a child-safe knife. They can also place pre-sliced vegetables and cheese onto bread and help press down cookie cutters.
- Ages 6-8: School-aged children can take more control, choosing their own ingredient combinations and layering them independently. They can safely use plastic knives to slice soft items like bananas or hard-boiled eggs.
- Ages 9+: Older kids can manage the entire process, from selecting a theme for their sandwich art to assembling complex wraps. They can also experiment with more advanced flavor pairings.
Allergy-Friendly Swaps
Customizing sandwiches and wraps for dietary needs is simple:
- Gluten-Free: Substitute standard bread and tortillas with gluten-free alternatives. Large lettuce leaves (like romaine or iceberg) also make excellent wraps.
- Dairy-Free: Use dairy-free cream cheese, hummus, or mashed avocado as a spread instead of cheese. Many plant-based sliced "cheeses" are available as well.
- Nut-Free: Swap peanut butter for sunflower seed butter or a bean-based dip to ensure the meal is safe for nut-free environments.
Packing & Storage Tips
Sandwiches and wraps are perfect for make-ahead lunches. To prevent sogginess, pack spreads and wet ingredients like tomatoes separately and let your child assemble them at school. Roll wraps tightly in plastic wrap or beeswax paper to hold their shape. Use bento-style lunch boxes to keep the artistic elements intact.
6. No-Cook Smoothie Bowls and Blended Drinks
No-cook smoothie bowls are a vibrant and creative way to pack nutrients into a fun, interactive meal. While they require a blender, the process involves no heat, making it a safe activity for kids. The concept is simple: blend frozen fruit with a creamy base like yogurt or milk until thick, then pour it into a bowl. The real magic happens with the toppings, turning a simple meal into an edible art project.
This recipe is one of the best no cook recipes for kids because it empowers them to become designers of their own meal. They can choose fruits for the base and arrange toppings like granola, seeds, and fresh berries into patterns and faces. This hands-on involvement encourages children to try new, healthy ingredients. If your kids love creating colorful concoctions, dive into more delightful smoothie bowl recipes.
Skill & Age Guidance
- Ages 3-5: Toddlers can help wash fresh fruit, add pre-measured soft ingredients to the blender cup, and press the "on" button with supervision. They especially love arranging toppings on the finished bowl.
- Ages 6-8: Young children can scoop frozen fruit, measure liquids, and securely fasten the blender lid. They can take charge of designing the toppings and experimenting with different combinations.
- Ages 9+: Older kids can manage the entire process independently, from selecting fruit combinations to arranging toppings. They can also explore adding boosters like chia seeds or protein powder.
Allergy-Friendly Swaps
Customizing smoothie bowls for dietary needs is simple:
- Dairy-Free: Use a plant-based milk like almond, oat, or soy milk. Swap dairy yogurt for a coconut, soy, or almond-based alternative to maintain a thick, creamy texture.
- Nut-Free: For toppings, replace nuts with sunflower seeds, pumpkin seeds (pepitas), or toasted coconut flakes. Ensure granola is certified nut-free.
- Gluten-Free: Use a certified gluten-free granola or puffed rice cereal for a crunchy topping.
Packing & Storage Tips
Smoothie bowls are best served immediately. However, you can prep the ingredients by portioning frozen fruit into bags ahead of time. For a blended drink on the go, make a slightly thinner smoothie and pour it into an insulated thermos. Toppings can be packed separately in a small container.
7. No-Cook Charcuterie and Cheese Boards
A no-cook charcuterie and cheese board is a visually stunning and interactive way for kids to explore flavors, textures, and the art of food presentation. This "recipe" involves arranging an assortment of cured meats, cheeses, crackers, fruits, and nuts on a platter, requiring zero cooking. It’s a fantastic method for teaching children about balancing salty, sweet, and savory flavors while creating an engaging meal.
This platter stands out among no cook recipes for kids because it fosters creativity, decision-making, and sensory exploration. Kids don't just assemble; they design. By choosing where to place each component, they learn about visual appeal and how different food pairings work together. It’s an empowering activity that transforms a simple snack into a culinary masterpiece they can proudly share.
Skill & Age Guidance
- Ages 3-5: Little ones can wash and dry fruits like grapes and berries, place crackers in small piles, and arrange softer items like cheese cubes on the board. This is a great opportunity to practice color and shape recognition.
- Ages 6-8: School-aged children can fold or roll softer cured meats like prosciutto or salami. They can also help slice soft cheeses with a kid-safe knife and pour dips into small bowls.
- Ages 9+: Older kids can take charge of the entire board's design. They can experiment with creating a "salami river," a "cracker cascade," and even select and label the different cheeses. This is a perfect time to explore different flavor profiles.
Allergy-Friendly Swaps
Building an inclusive and safe board for everyone is simple with thoughtful substitutions:
- Gluten-Free: Replace traditional wheat crackers with rice crackers, corn chips, or sliced vegetables like cucumber and bell peppers.
- Nut-Free: Swap out nuts for crunchy roasted chickpeas, pumpkin seeds, or sunflower seeds. Ensure all other components are free from cross-contamination.
- Dairy-Free: Use a variety of plant-based cheese alternatives. Hummus and other dairy-free dips are also excellent additions.
Packing & Storage Tips
Charcuterie boards are best assembled just before serving, but you can prep components ahead. Pre-slice cheeses and meats and store them in separate airtight containers. For a packed lunch, use a bento box with multiple compartments to keep crackers, meats, cheeses, and fruits separate and fresh.
8. No-Cook Energy Balls and Bite-Sized Snacks
No-cook energy balls are a fantastic way to create nutrient-dense, bite-sized snacks with children, involving only mixing and rolling. This recipe style centers around a binder like nut butter or dates, combined with ingredients like oats, seeds, and dried fruit. It's an excellent opportunity to teach kids about how sticky and dry components come together to create a delicious and energizing treat.
This method stands out as one of the best no cook recipes for kids because it's highly tactile and completely customizable. Kids love the hands-on process of mixing ingredients and rolling the mixture into balls, which helps develop sensory awareness and fine motor skills. The process also allows for endless creativity, encouraging children to develop their own signature flavor combinations.
Skill & Age Guidance
- Ages 3-5: Preschoolers can help measure and pour ingredients, pick out their favorite dried fruits, and get their hands messy mixing the ingredients in a large bowl. They can also practice rolling the mixture into small balls.
- Ages 6-8: Young children can take a more active role in designing the recipe, choosing the type of nut butter and add-ins. They can handle the entire mixing and rolling process with minimal supervision.
- Ages 9+: Older kids can manage the entire recipe from start to finish. They can even experiment with a food processor (with supervision) to break down dates or nuts, and they can create and record their own "secret" recipes.
Allergy-Friendly Swaps
Energy balls are incredibly adaptable for various dietary needs:
- Nut-Free: Swap nut butters for sunflower seed butter or tahini. Use rolled oats, pumpkin seeds, and sunflower seeds instead of tree nuts.
- Gluten-Free: Ensure you are using certified gluten-free rolled oats, as standard oats can have cross-contamination.
- Date-Free: If dates are an issue, use other sticky binders like brown rice syrup or pure maple syrup, adjusting the amount of dry ingredients as needed.
Packing & Storage Tips
Energy balls are perfect for meal prep. Store them in an airtight container in the refrigerator for up to one week, or in the freezer for up to three months. For lunch boxes, pack a few in a small container or a dedicated compartment of a bento box. They hold their shape well and provide a perfect boost of energy.
No-Cook Recipes for Kids: 8-Item Comparison
| Recipe | Implementation Complexity | Resource Requirements | Expected Outcomes | Ideal Use Cases | Key Advantages |
|---|---|---|---|---|---|
| No-Cook Caprese Skewers | Very low — simple assembly, no equipment | Fresh tomatoes, mozzarella, basil, skewers, optional balsamic | Teaches flavor pairing, visual presentation, quick snack | Summer gatherings, kid tasting activities, quick appetizers | Fast, minimal tools, customizable, photogenic |
| DIY Yogurt Parfait Bowls | Very low — layering assembly only | Yogurt, granola, fresh fruit, bowls, honey | Teaches portion control, nutrition balance, texture contrast | Breakfasts, customizable snacks, visual food tracking | Highly customizable, protein + fiber focus, visually appealing |
| No-Cook Hummus and Veggie Dip Platters | Low — simple prep and arranging | Pre-made dips (hummus/guacamole/salsa), fresh veggies, cutting tools | Encourages vegetable exploration, flavor comparisons, dipping skills | Snack platters, nutrition programs, family sharing | Promotes veg intake, variety of flavors, low waste |
| No-Cook Fruit Kabobs with Dipping Sauces | Low — cutting and skewering | Seasonal fresh fruit, skewers, dipping sauces | Teaches seasonality, ripeness evaluation, portion awareness | Parties, kid snacks, market visits for fruit selection | Fun for picky eaters, colorful, easy to customize |
| No-Cook Sandwich Art and Wraps | Low–Medium — assembly with many options | Breads, proteins (deli/pre-cooked), vegetables, spreads, cold storage | Teaches flavor layering, texture balance, ingredient choice | Lunch prep, deli-style learning, school lunches | Highly customizable, builds ownership and palate skills |
| No-Cook Smoothie Bowls and Blended Drinks | Low–Medium — requires blender (no heat) | Blender, frozen fruit, yogurt/milk, toppings, frozen storage | Teaches blend ratios, texture control, nutrient density | Breakfasts, smoothie-bar style lessons, tasting experiments | Photogenic, teaches ingredient interaction, adjustable texture |
| No-Cook Charcuterie and Cheese Boards | Medium — curated assembly and pairing | Cheeses, cured meats, crackers, fruits, nuts, proper storage | Develops palate refinement, pairing skills, visual composition | Tasting sessions, special occasions, advanced food lessons | Introduces sophisticated flavors, great for comparative tasting |
| No-Cook Energy Balls and Bite-Sized Snacks | Low–Medium — mixing and shaping by hand | Nut butters, dates/dried fruit, nuts/seeds, refrigeration | Teaches binding, texture consistency, portion control | Healthy snacks, on-the-go treats, DIY learning activities | Hands-on, portable, highlights ingredient ratios and textures |
Turn Every Snack into a Story
These no-cook recipes for kids are more than just meal prep—they're interactive food experiences. From the geometric fun of Caprese Skewers and the artistic freedom of DIY Yogurt Parfait Bowls to the communal joy of a Hummus and Veggie Dip Platter, each idea is designed to transform the kitchen into a safe, creative, and empowering space for your children. These are your tools for building skills, mindful eating, and lasting family memories.
The ultimate goal is to remove the barriers between your kids and their food, fostering a healthy, curious relationship with what they eat.
Beyond the Plate: Capturing Your Food Memories
Food is a powerful medium for connection and learning. When your child threads their own Fruit Kabob or arranges a colorful wrap, they aren’t just making lunch; they are making decisions, practicing fine motor skills, and expressing their unique preferences. These moments are the building blocks of their culinary identity.
Think of each creation as a part of their personal taste journey:
- The Discovery: The first time they realize they love the tangy pop of a cherry tomato next to creamy mozzarella.
- The Preference: The specific order of fruits they insist on for their kabob, creating a pattern only they understand.
- The Memory: The afternoon you spent making No-Cook Energy Balls together, laughing as sticky hands rolled oats and honey.
These are the memories that stick and define a family's culture around food. By embracing these simple, heat-free activities, you are actively teaching your kids to become confident, mindful eaters who see food not just as fuel, but as a source of joy, creativity, and connection.
Your Actionable Next Steps: From Recipe to Ritual
Mastering these no-cook recipes for kids is about establishing a new rhythm in your home. Your role shifts from being a cook to a collaborative guide, encouraging exploration and celebrating every small culinary success.
To continue this journey, commit to these three actions:
- Schedule a “No-Cook Night”: Dedicate one meal a week to a recipe from this list. Let your kids choose the dish and take the lead on gathering and assembling the ingredients.
- Start a "Taste Test" Journal: Encourage your kids to describe their creations. Was it sweet, salty, crunchy, or smooth? Capturing these small details helps them develop their palate.
- Document the Wins: Take photos of their proudest creations. Jot down funny quotes or surprising ingredient combinations they invent. This is your family's private food storybook.
By turning mealtime into a playful, hands-on activity, you are giving your children an invaluable gift: the confidence to nourish themselves and the memories of creating something wonderful with you. Every snack, every wrap, every parfait becomes a cherished chapter in your shared story.
Ready to capture every delicious discovery and build a private food diary for your family? Download Savor to track your kids' favorite no-cook creations, remember their unique taste preferences, and turn every meal into a lasting memory. Start documenting your family’s food journey today at Savor and rate like a critic, together.